If the video above is not playing, something in your browser is probably blocking YouTube. You can watch it on YouTube or read the written version below.
Set up an AI assistant that actually does things
Everything from a blank slate: creating an account, installing Prizmi Link (the small app that lets Prizmi do things on your computer), connecting the two, and sending a first request.
There is one choice to make along the way, which is where you chat from. The browser works and so does Telegram. The difference only matters if you want reminders to reach you when the browser is closed, and the video covers what each one gives you.
No technical background needed. Connecting your computer is shown at full speed, click for click.
In this video
Transcript
Read what’s said in this video
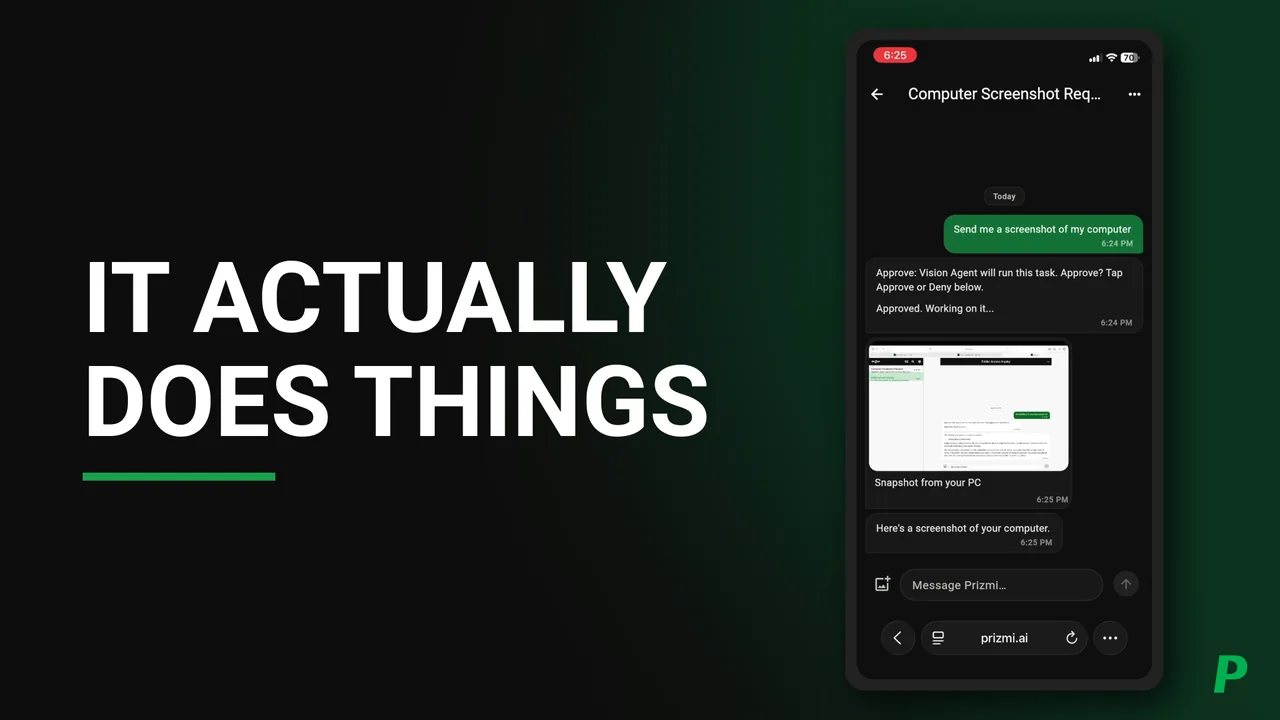
This is me asking Prizmi to send a screenshot of my computer to my phone. In this video I'll show you, step-by-step, what Prizmi is, how you can sign up, how you can connect your computers, and how you can start asking Prizmi to get things done for you. Without further ado, let's get started.
Prizmi is an AI assistant that actually does things for you instead of just answering questions. For example, it can handle your emails, prepare text messages for you, organize your files, fill out web forms, and many many other things. Prizmi continuously learns new skills, and when that happens we build a tutorial to show you how to use it. Prizmi is one brain that can connect to all your devices, and you talk to it the way you'd text a real assistant. You can use your phone, or use a web browser on your computer to do that.
Prizmi is also proactive, in the true sense. It runs your tasks on a schedule, and it messages you on its own when it has something useful to say.
It's built with your privacy in mind. Your information is encrypted and kept private, and it's never used to train AI. And when Prizmi sends something back from your computer, you can have it encrypted end-to-end, so that only your own device can open it. Not even Prizmi can see it.
Lastly, Prizmi is built to be safe for everyone. It simply cannot quietly do damage. For example, out of the box, Prizmi has no way to delete a file. And it only ever sees the folders you point it at. Those checks live outside the model, so none of it depends on the AI deciding to behave itself, and that's very important.
Today, I'll show you how to sign up and get going. The only thing you actually need is an email address. You can sign up with Google, skip the two setup steps, and be chatting with Prizmi in less than a minute.
So, let's get started. You can either go to the sign-up page or to the pricing page. There's basically not much difference here. The first step is to choose your method. If you have a Gmail, that's the fastest. If not, you just pick a username and enter your email and a password. And once you do that, you'll get a verification email. Once you verify your email, you are good to go. Here I'm going to show you how you can sign up with Google.
So here you enter your Gmail address. This is a test account that we created for the tutorials. Then you enter your password. If you have two-factor authentication, you need to enter your code. I'm going to do that right now.
Here it asks you to give permission, and it's just your name and profile picture, and that's it. So you give permission. And now you're in onboarding.
As you can see here, there are three steps, and you could just click next, next, next, and you'd be done if you wanted to. But the purpose of this tutorial is making sure you understand all the steps. So the first step is installing Prizmi Link on your computer.
Prizmi Link is what lets Prizmi work directly on your machine, for organizing your files or using your browser, when you ask it to. So you can download and install it. Here your operating system is pre-selected. So if you are using Windows, this would be adjusted for you automatically.
So you can simply click on the installer, and once it's downloaded, then you can open it. On Mac, you just move it to Applications, and then you simply open your Applications, double click on it, and open it. On Windows, it's very similar. You just double click on the installer and follow the wizard. It's extremely simple. There is nothing there that would confuse you.
So, very quick setup here. First you need to choose a name for your computer. I would recommend choosing simple and easy names. In general, Prizmi can connect to all your devices. So you can have a work computer, a personal computer, a Mac, a Windows, however many you want. Just keep in mind that the free plan connects one computer, and the paid plans let you connect as many as you like. So here I'm going to choose Mac. So when I talk to Prizmi, I would say, do this on my Mac. And if there is only one computer, you don't need to say anything, it would just know that you have only one computer.
Next, you select what folders you want to give access to. You can select anything you want. Here I'm going to just go ahead and select my Downloads folder, and click next. Here you can select what websites you want Prizmi to have access to. You can either select all websites, or add websites one by one. In some cases, such as when it's using your browser, Prizmi would still request you to add the specific website, just for safety reasons, even if you have selected all websites.
And then next, you need to just connect your account to this computer. It's very simple. You just click on Link this PC, click yes, and that's it. Basically, you are done with Prizmi Link and connecting your computer to your account. You go back here, and you can just click Done.
And if you want, there is a very quick tour of the app. It's extremely simple. It's just mainly about permissions. So you're gonna select yes.
Here's where you can look at your computer's name. You can also edit your computer name to a name that you can remember more easily. And it also shows your status, whether you are connected or not.
And then you have the Permissions page. Here you can control what folders and websites Prizmi can access. As you can see here, we selected the Downloads folder, and that's what we see here, and the other permissions are all here.
Next, you see your navigation. Pretty much three or four simple options. So basically, on a day-to-day, you don't really need to look at your Prizmi Link app. Here you can just switch between pages, and go through the setup that we just went through, or reach support from here.
And then here you can see the updates. Whenever there is a new version you get notified, and you can update the app with just one click. Then you just close it, and it would continue to run in the background. And if you need, you can just quit it from here, but that's not very important.
Now we can go back to the setup. Next step is figuring out how you want to chat with Prizmi today. You have two options. One is the Telegram app, if you already have it installed. If not, you can simply install it and use it. That way you can get notifications on your phone. As I mentioned, Prizmi is proactive. So that way, you don't have to worry about whether your computer is on, or whether your browser is open or not. Even when using your browser, you still get notified when Prizmi reaches out to you. If you don't want to install anything, you can just chat with Prizmi from your dashboard, on your phone or on your computer.
So for completeness, I'm going to also go through the Telegram setup. Basically you just point your phone camera to this QR code. Very simple. Then you simply need to connect it to your account. I'm going to skip the details and go straight to the next step.
So, here you just select a name for your messaging app, the same way you did for your computer, because you can even have multiple messaging apps, if you want, in the future. So I just select iPhone because I'm on my iPhone, and then say connect messaging app. I already have Telegram installed. If not, then you can simply go ahead and install it first. Then you just select Open Telegram. And you get this page, and you tap Start. And that's pretty much it. You can start chatting with Prizmi right away.
Now, going back to the onboarding. So you saw that we set up our Telegram messaging app. Now, the last step is your plan. You can choose a plan that works best for you. If it's your first time, you can start with the free plan, and with the free plan you can use it a little every day and it's free forever. Today, I'm going to just choose the Prizmi free plan, and then continue. Now you are completely done with your onboarding.
As you saw, no technical background is needed.
So, once you are done with the setup, this is where you would land. You would be welcomed to your dashboard, and you can take a quick tour to get familiar with your dashboard. So I'm going to go quickly through the tour and show what you can expect. Just click on next. The place where you spend most of your time would be your dashboard.
Here are your devices. As you can see, your Mac computer is here, and you have an option to pause the device, or remove the device, and add new devices here as needed. And you can see here that we also added our messaging app.
Next, this is where you can chat with Prizmi from your dashboard, right in your browser, and there is nothing to install if you don't want to.
This is where you can find skills. There are two groups of skills.
One is cloud skills. Cloud skills are the ones that don't need any computer, and you don't even need to install the Link app. Some skills need a quick setup. For example, you can connect your Gmail. But the majority of skills don't need any setup. We add new skills all the time and they just show up here, ready for you to use.
In addition to cloud skills, there are also device skills. These are the skills that run on your computer, such as Screen Helper, File Organizer, Browser Use, and more.
Here's the command shortcuts. You can create shortcuts if you want. For example, there's a command that you use on a regular basis. Perhaps you want Prizmi to check your emails every day. Instead of typing it every time, you can just create a command here. As long as your command starts with a dollar sign, you can then use anything after that. Even just one number would work.
And here's where you can see your tasks. For example, when you ask Prizmi to do something on a regular basis, it would show up here, and then you have the option to pause or delete a task. So you can have recurring tasks and one-off tasks. And if something fails, when Prizmi is trying to reach your device, it would be queued, and you can see it here and you can cancel it. Whenever Prizmi uses your browser, all the session information is here, so you can see everything that was done.
Here you see your plans and usage, and from there you can manage your plan, upgrade, look at your payment methods, or anything else related to your plan. Obviously, docs, a very comprehensive set of documentation. You can always find the answers to most of your questions here.
Here you can reach the support if you need something. Or if you want to request a new feature that you think might be useful for others, you can always reach out through the support page. And here's your proactive check-in toggle. As I mentioned, Prizmi is truly proactive, and it will check in with you from time to time when it has something helpful. I need to also say that this is not available on the free plan, but it is available on all paid plans.
You can always replay this tour if you want, and if there are any changes, the tour would get updated automatically, so there is nothing for you to wonder about if there is a change. And that's it.
You're ready to use Prizmi, and I'm going to just open the chat in the browser. Once you open it, you see that it would ask you to turn on notifications. I highly recommend that you turn on the notifications, so that when you ask something, or you get a reply, you get notified. So I'm going to turn on the notifications, click allow, and that's it. You can start chatting with Prizmi right away.
For example, you can ask which folders Prizmi has access to. And it would ask you to approve, and you get a response fairly quickly. You see here, the folder it currently has access to is your Downloads folder, and if you recall, we just gave permission to the Downloads folder. This wraps up our introduction.
Thank you for watching. If you find this tutorial useful, please remember to like and subscribe. We'll make plenty of tutorials for all of Prizmi's skills, and that way you'll get notified right away. If you have any questions, please add a comment below. If you have questions about your own account, please reach out to us using the contact page.
Questions about this video?
Ask in the comments on YouTube and we’ll answer there, so the next person who wonders the same thing finds it too. If it’s about your own account, use the contact form instead so nothing private ends up in public.